The New Year is well under way and I'm popping in to apologize for being away so long!
Work and holidays has really slowed any progress we have made around here...that and the fact that
our to-do list has dwindled.
We started our Master bedroom in November and although it has seemed to be really slowly progressing, we are at a point now that I can share it with you. Those of you who follow on Facebook and Instagram may have already seen the progress but I will walk you through our process.
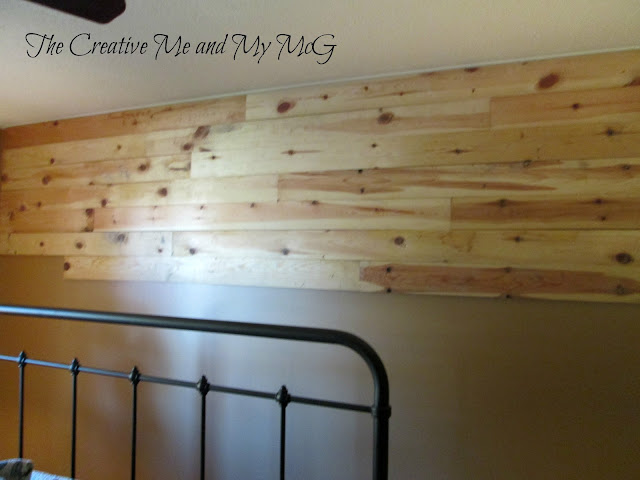
Back in the summer you may remember that McG secured some free pine tongue and groove flooring from a work friend who was ripping it out of his living room. I knew that I wanted to tackle a "ship lap" wall in the bedroom, but it really wasn't high on the list at the time. We took the wood and stored it in the garage. We cleaned it up by passing each board through the table saw to cut off the edges with the nails/nail holes. One side of the wood had been varnished so we flipped the wood over and McG nailed it to the wall behind our headboard with his nail gun.
I selected the boards, keeping in mind, to vary the sizes and the woodgrain to get the best patterns. We left it plain for several weeks, until I could decide whether I wanted to paint it white or stain it.
After finding this inspiration photo, I knew that stain was the way to go. First we painted the ceiling a fresh coat of white and the walls a soft grey almost white called Glacier Stream by Sherwin Williams.
I stained selected boards with a special walnut stain by Minwax first.
Next I used Weathered Grey stain by Minwax over all of the boards to give the wall an aged wood effect that I just LOVE!!
At first I was worried that the room would be too "dark" because of the stained wall, but with the light grey, almost white color on the other three walls, to room is actually much brighter than the dark caramel that was in here when we purchased the house. You can see the old color in this photo we took just before we started to add the wood. Although a warm caramel color, it really made the room feel small and dark. The room also previously had dark walnut stained trim. We painted out the trim around the doorways a bright white and we are in the process of replacing the baseboard trim as well.
We knew that we needed to paint our closet doors, but now that the weather is too cold to paint outside in the garage, we decided to temporarily replace our closed doors with curtains. I found these panels on clearance at our local Walmart for just $11.00 per panel. We purchased a $12 rod kit as well.
We are in the homestretch on this project and then we will be heading either into the spare bedroom next door to our room or the main bath.
I'll keep you posted as we move along! This home is quickly becoming my favorite home so far!
Cheryl


