Thursday, November 26, 2015

Update on the Kitchen Makeover

Well we are a few weeks in and it feels like we are crawling at a snail's pace.  I think McG is getting frustrated with the whole process, because although he is working on the kitchen every night after work until 9 pm, he said he feels like not much is getting done.

Me, on the other hand, I think lots has been accomplished.  There are quite a few little projects that needed to be done even before we could start on the backsplash.  Electrical boxes needed to be installed inside the wall since there were none before - WTF!!  Yes, we went to change the outlets and switches only to find there were no boxes in the wall, just the wiring.  It kind of made McG freak out a bit, but I calmed him down and off to the hardware store we went to get boxes and extenders since we would be adding the beadboard on top of the 5/8 MDF that was already there.

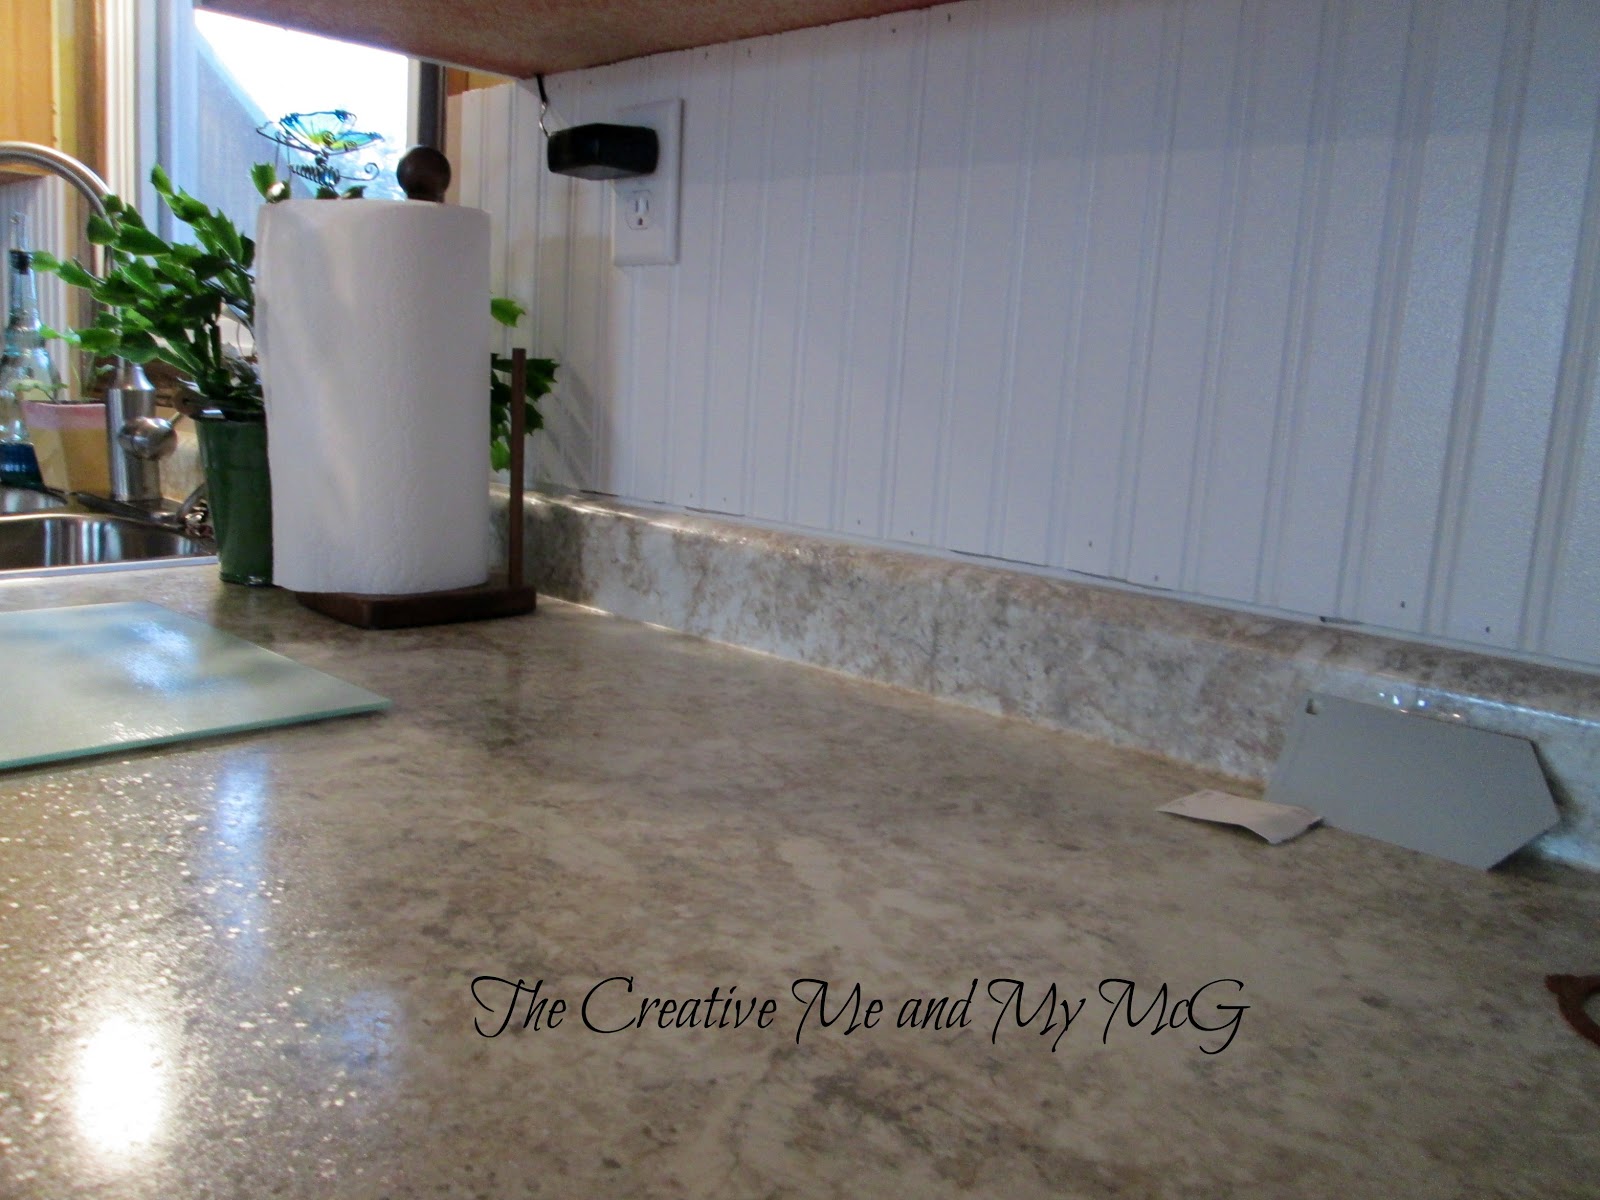
Once that was completed we could start to measure and cut the beadboard panels.  We chose to use
tongue and groove strips of beadboard that are approximately 4 inches wide and 8 feet long.


 Once they were attached to the wall with adhesive and small brad nails.  We caulked and painted them with two coats of exterior ultra white semi-gloss paint.  We find that exterior paint holds up much better to the spills and wiping that will be required in a kitchen or bathroom.


There will be a small trim that will be put where the backsplash meets the counter top as well.


The cabinet doors have gone to the painter and they should be back by mid December.  In the meantime, the painter has dropped off the primer and paint for us to paint the cabinet boxes.  That will be next up on the agenda I think.  We still have to add MDF around the window and behind the stove to bring all the wall levels to a consistant one.  Then the walls above the beadboard will need to be painted and new trim be installed around the windows and to cap off the beadboard.

We are hoping to wrap this project up by mid December so that we can decorate and celebrate the holidays in our new kitchen!

I'll be back soon with another update!

Cheryl

Friday, November 20, 2015

Christmas on the Porch

I know I said I wouldn't be decorating for Christmas until at least December 1st...but the weather here has been amazingly beautiful this week with temperatures in the high 50's and low 60's - not summer weather by any means but so gorgeous for Ontario in November!

I took advantage last weekend to string some lights onto the porch railing and in the shrubs and trees along the front of the house...but it needed something more.


I went to the Dollar Store and purchased five rolls of this red, green and white sinemay mesh ribbon and then draped it over the lights on the porch railing.  I also added red bows to the ends by the stairs.


I cut some pine and cedar branches from the trees in the yard and added them along with some sticks to my black iron urns on either side of the stairs.


I then used some wire to add some large red and white ornaments to the urns.


The ornaments I also purchased at the Dollar Store and they are plastic so I don't have to worry about them breaking.


Yesterday I purchased this wreath at one of the thrift stores I visited on a day out with my friend.


It's actually plastic and a bit retro, but I love it, and at just $5.00 it was a steal.  It should be able to withstand any bad weather that might be headed our way in the next month or so.


But right now, I'm just enjoying this unseasonably warm November...especially since the geraniums are still blooming beautifully on the porch!!

Cheryl

Friday, November 13, 2015

Kitchen Update - The New Counters are in!

YES!  I am so glad that we can finally check this project off the to-do list!

We knew when we purchased the house last year that we wanted to update the kitchen, but we also knew we wanted to live in it for awhile before deciding what we would do.

New counter tops were definitely on the list, but they couldn't bust the budget....so NO granite or marble.  We went with a high definition Formica counter top that we purchased in Michigan at Menard's.  We did check out the pricing here in Canada, but at less than half the cost, buying it in the U.S. was kind of a no-brainer for us.  We are very lucky that we live in a border town and have the option to shop over there.

We went with a finish called Carrara Pearl which is a creamy white background with swirls of taupe and gray.


We purchased a ten foot straight piece and two six foot mitered pieces (one right hand mitered and one left hand mitered) for our corner section.


Before we could begin McG had to remove the odd corner cabinet that was existing at the end of our counters and install the new bank of drawers that we purchased here at our local Home Depot.

He had to add some shims to the back because the hardwood flooring was not underneath the cabinet when he took it out.


Once that was complete we installed the new counter top and clamped it down.  Then he marked the hole he needed to cut for our new sink.  We purchased the new stainless steel sink at our local Lowe's store for $99 on sale.


Once the sink was in, he reconnected the plumbing and the dishwasher.


We kept our original faucet since we had just installed that last year when we moved in.


The new counter is much lighter and brighter than the old one which was a pinky beige.  You can see the original Formica back splash is still there.  That will be dealt with soon as well!

McG and our son cut the mitered pieces to the appropriate length and then glued and clamped the corner section together.  We let it sit overnight for the glue to dry and then installed it last night.


I am LOVING how the new counters look.  I would highly recommend this Formica 180FX counter top.  It has a realistic look of stone and even has a texture to it.  While I would have preferred not to have the ridge going up the back of it, at half the price by buying it pre-fabricated in store, I feel it's a great budget friendly option.   It also has the ogee edge which was an upgrade in price when I had it quoted here in Canada.

The price that I was quoted here in Canada was $750 plus 13% tax ($847.50).  The total cost to purchase this was $305 American - add to that the exchange on the money and the $12 to cross the border and this comes in at $422.70 - so a savings of 50% - which is great for our kitchen budget!

Next up is getting the cabinet bases ready for paint and sending the cabinet doors out for painting.

Stay tuned!!

Cheryl

Wednesday, November 04, 2015

Project Post - A Year in the Making

Many of you who follow here will remember where our side yard started out last fall when we purchased this house.  For those of you who don't, we have five large pine trees that run along the side yard.  The day after we moved in, we had some friends come over to help us trim the trees up
to the fence line. YES - there is a fence hidden back there!


We trimmed the first three last fall and the other two early in the spring this year.


I decided that instead of growing grass in the areas that were bare under the trees, I would instead plant gardens.  Here is what the side yard looked like last fall.


Since we have trimmed up the rest of the trees and under planted them, the garden now spans
approximately 80 feet along the side fence.

The cost to mulch this area would be quite large since it ranges from 8 to 20 feet deep in some spots.  However, these trees have provided me with mulch of their own in PINE NEEDLES.


Last fall I noticed a huge amount of needles that were falling out of the large pine near the road. Subsequently, I started raking them up and spreading them around the base of the tree in between the hostas that I had planted under them. We really thought we were lucky to have the pines instead of deciduous trees like Maples or Oaks that drop their leaves in the fall.  I have to say that I think that the pines are messier trees - BUT - their mess is at least useful to me in that it is now helping to keep the weeds down in the garden.

I have raked up the pine needles all year and now I can finally say that this garden is fully mulched!


They even have the colour of mulch and from the road you can't even tell that it's not actual mulch.


This project obviously took some time and work to complete, but it was FREE and  leaving this amount of needles on the lawn would not be good for it.  It's a great recycle project that gives so much benefit to the garden.  Yes the needles will eventually breakdown, but there will always be more needles to rake up and replace them with, so it's a WIN/WIN!!

Do you have a great recycle project that you have completed?  I'd love to hear about it!!

Cheryl