
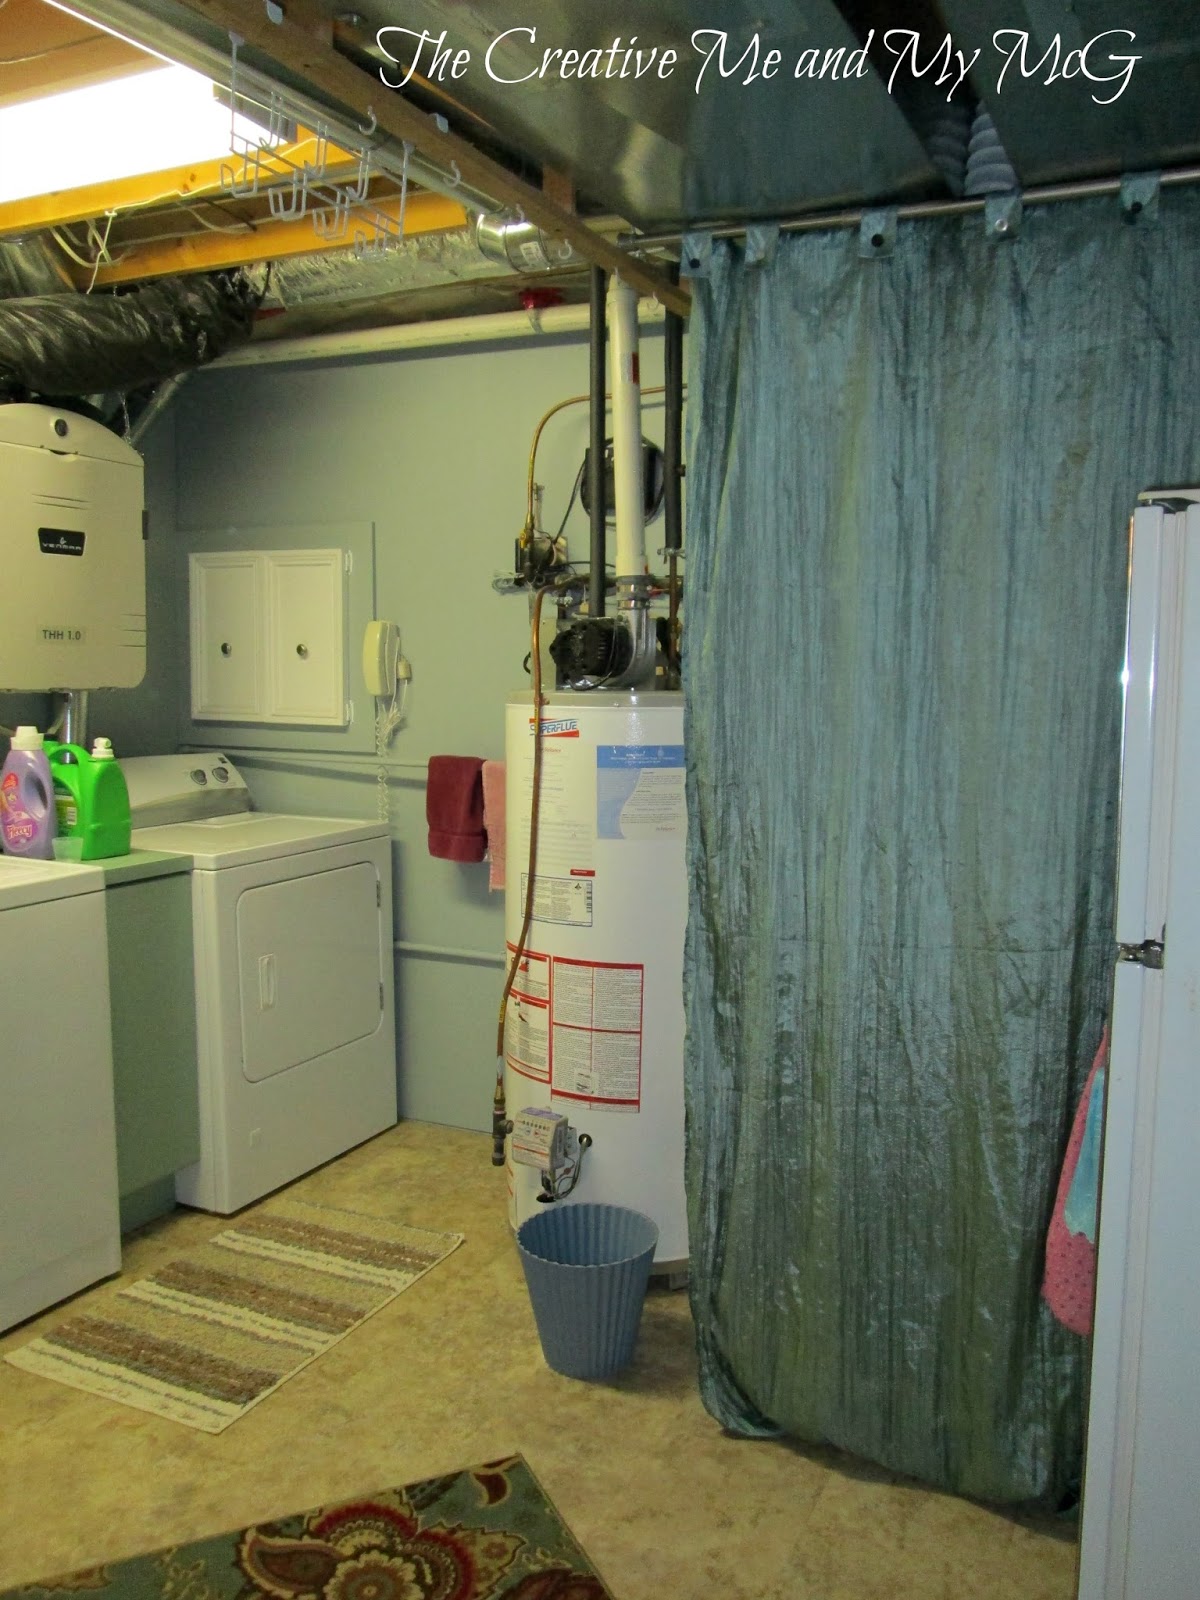
Okay, back many months ago...I showed this picture of "our dirty little secret"...this is the only photo I showed you..

I was not lucky enough to have the forethought to have a separate laundry and utility room...ours are combined. And as a result I get the pleasure of looking at exposed pipes and the furnace and hot water tank everytime I spend time in my laundry room. Here is some more of what it looked like BEFORE...get ready for some scary stuff!

Storage was a major issue in here, so that was my main objective in doing this laundry room - that and it was just dark and dingy.
As it seems I spend a fair bit of my time in this room, it was time for an overhaul.

We are keeping it real in these photos...cat litter box and all!!

McG and I have worked some magic over the last couple of months and now it's looking much better.
Is it my DREAM laundry room?
NO - but it is a lot more pleasant to do laundry now - take a look!
We did some re-arranging and were able to block of some of the view of the furnace, but the hot water tank could not be covered...apparently that would be a fire hazard. We also couldn't do anything with the ceiling. The pipes and ductwork are just at too many different levels to be able to be done in our budget.
However, we were able to tile the floor!
These are press and peel vinyl tiles that look like Travertine - they were 89 cents a piece on sale.
The whole room cost just $75.

McG finished the drywall seams and painted the room with the leftover paint from the living room.
He also took two leftover doors from our media cabinet makeover and covered the electrical panel.
A definite improvement!
He took out the ugly counter and sink and in its place installed a shelving/folding table made from 2 hotel headboards that we bought at the Habitat ReStore for $10 each. I used that great vintage bed sheet that I bought for 50 cents on our trip to the cottage earlier this month to make a skirt to cover the shelves.

The two white cabinets above were made from cutting in half a cheap pantry cupboard our daughter used to have in her bedroom. It was sitting in McG's workout room, so that was FREE!!
The "laundry" artwork was picked up at The Christmas Tree Shop for just 75 cents.
The floral canvas I had here already.

Here's a close-up of the sheet...I mean curtain...and below is a closer look at the headboards we used for the shelving.

The raised edge is perfect and helps to keep my laundry baskets from falling off.
We moved the little freezer to the side wall and added the two white cabinets that used to be over the sink. We took out the shelving that used to be between them and screwed them together before hanging them on this wall. We also brought in an old bookcase that used to belong to McG's parents - it houses some storage for my scrapbooking supplies and other items that had no home. It too got a curtain from that 50 cent bed sheet!

Here's a look at that whole corner from another angle.

Our storage issues were definitely addressed and there is no more staring at extra toilet paper and paper towel rolls in this room. It has a calm feeling that makes doing the laundry a little bit nicer!
Cost breakdown for this project:
flooring $75
2 headboards for the shelving $20
sheet for making curtains 50 cents
laundry art 75 cents
paint - free
cabinets - free
TOTAL - $96.25
Have you completed a budget renovation lately?? I'd love to hear about it!
Much better. It's amazing what a little creativity can do.
ReplyDeleteVisiting from SITS.
thanks! I really didn't think we could do it on such a small budget...but creativity really was the key!
DeleteMy laundry area has similar issues to your "before" photo: the furnace is there, scrappy shelves for storage, concrete floor with old paint and concrete block walls. Maybe I should let you and your husband get at it! You've done a beautiful job, Cheryl.
ReplyDelete-Karen
thanks Karen! It really wasn't too hard...worst part was the purge!!
DeleteLOVE!
ReplyDeletethanks for stopping by!
DeleteLooks good, and you are a genius for using headboards for shelving!
ReplyDeleteChristine - they were a lucky find - we had originally had some shelving boards in our cart, but once we spotted these - already with their formica finish and edging, it was a no-brainer and at 10 bucks a piece they were a cheap solution!
DeleteCheryl that is so cute! Love the colors! Thanks for linking up!
ReplyDeleteOh what a great transformation! I really like the flooring you used, and I love the idea of the headboards as shelves. Great job! laurie
ReplyDeletethanks Laurie! glad you stopped by!
Deleteyou know those floor joists above your head where the hangers are you can hang a few of those l brackets that have a big scoop place to hang a rod on hang them on the wood then use a shower curtain rod the ones than expand between them then you got a strong place to hang hangers just like a closet ...now i got to know what is that thing hanging on the wall over the dryer is it is white and has thh 1.0 on it what the heck is that ...lol
ReplyDeleteLisa - the thing hanging over the dryer is called a Venmar - it is an air purifier and hepa filter system that was installed a few years ago when I was diagnosed with leukemia...as a stem cell transplant patient (I am almost 3 years post transplant) it is an extra precautionary device that helps to filter toxins and germs out of our home - when they installed it, that was the only place it would fit and although it is ugly I know, it helps to keep me a bit safer from any bad germs that the rest of the family brings home. thanks for asking! Glad you stopped by!
DeleteWow! Under a $100, and what a difference....I am afraid that my dirty little secret tops yours. Would love to do a similar renovation. Found you via One More More Time! New follower!
ReplyDeleteLinda
mysewwhatblog.blogspot.com
thanks for following!! I will be sure and head over and check out your blog as well!
DeleteHi.. Stopping by to let you know you have been featured over a One More Time Events....Thank you for sharing! Would love it if you would join this weeks party http://www.onemoretimeevents.com/2013/09/warming-up-your-home-for-winter-and.html .. Xo Tammy
ReplyDelete